2 - Installing Apache Texera using Docker
This document describes how to set up and run Texera on a single machine using “Docker Compose”.
Prerequisites
Before starting, make sure your computer meets the following requirements:
| Resource Type | Minimum | Recommended |
|---|
| CPU Cores | 2 | 8 |
| Memory | 4GB | 16GB |
| Disk Space | 20GB | 50GB |
You also need to install and launch Docker Desktop on your computer. Choose the right installation link for your computer:
After installing and launching Docker Desktop, verify that Docker and Docker Compose are available by running the following commands from the command line:
docker --version
docker compose version
You should see output messages like the following (your versions may be different):
$ docker --version
Docker version 27.5.1, build 9f9e405
$ docker compose version
Docker Compose version v2.23.0-desktop.1
By default, Texera services require ports 8080 and 9000 to be free. If either port is already in use, the services will fail to start.
On macOS or Linux, run the following commands to check:
lsof -i :8080
lsof -i :9000
If either command produces output, that port is occupied by another process. You will need to either stop that process or change Texera’s port configuration. See Advanced Settings > Run Texera on other ports for instructions.
Download Texera
Download the docker compose tarball and extract it.
Launch Texera
Enter the extracted directory and run the following command to start Texera:
docker compose --profile examples up
This command will start docker containers that host the Texera services, and pre-create two example workflows and datasets.
If you don’t want to have these examples pre-created, run the following command instead:
If you see the error message like unable to get image 'nginx:alpine': Cannot connect to the Docker daemon at unix:///Users/kunwoopark/.docker/run/docker.sock. Is the docker daemon running?, please make sure Docker Desktop is installed and running
When you start Texera for the first time, it will take around 5 minutes to download needed images.
The system should be ready around 1.5 minutes. After seeing the following startup message:
...
=========================================
  Texera has started successfully!
  Access at: http://localhost:8080
=========================================
...
you can open the browser and navigate to the URL shown in the message.
Input the default account texera with password texera, and then click on the Sign In button to login:
Stop, Restart, and Uninstall Texera
Stop
Press Ctrl+C in the terminal to stop Texera.
If you already closed the terminal, you can go to the installation folder and run:
docker compose --profile examples stop
to stop Texera.
Restart
Same as the way you launch Texera.
Uninstall
To remove Texera and all its data, go to the installation folder and run:
docker compose --profile examples down -v
⚠️ Warning: This will permanently delete all the data used by Texera.
Enable the Texera Agent
The Texera agent is powered by a large language model (LLM). By default, Texera uses Claude Haiku 4.5 as the LLM and queries it through LiteLLM. Without an API key, the Texera agent panel still appears but model calls will fail with a provider auth error.
To enable it:
- Stop Texera if it is already running.
- Get an API key for the LLM. Since Claude Haiku 4.5 is enabled by default, you need an Anthropic API key.
- Export the key and restart Texera:
export ANTHROPIC_API_KEY=sk-ant-...
docker compose --profile examples up
Once Texera is up, create a new workflow and open the Texera agent panel at the bottom right. Type a task like:
For /texera/popular-movies-of-imdb/v1/TMDb_updated.csv, visualize the top 10 most-voted movies.
To switch providers or add more LLMs, see Add more LLMs or providers.
Advanced Settings
Before making any of the changes below, please stop Texera first. Once you finish the changes, restart Texera to apply them.
All changes below are to the .env file in the installation folder, unless otherwise noted.
Run Texera on other ports
By default, Texera uses:
- Port 8080 for its web service
- Port 9000 for its MinIO storage service
To change these ports, open the .env file and update the corresponding variables:
- For the web service port (8080): change
TEXERA_PORT=8080 to your desired port, e.g., TEXERA_PORT=8081. - For the MinIO port (9000): change
MINIO_PORT=9000 to your desired port, e.g., MINIO_PORT=9001.
Change the locations of Texera data
By default, Docker manages Texera’s data locations. To change them to your own locations:
- Find the
persistent volumes section. For each data volume you want to specify, add the following configuration:
   volume_name:
     driver: local
     driver_opts:
       type: none
       o: bind
       device: /path/to/your/local/folder
For example, to change the folder of storing workflow_result_data to /Users/johndoe/texera/data, add the following:
   workflow_result_data:
     driver: local
     driver_opts:
       type: none
       o: bind
       device: /Users/johndoe/texera/data
If you already launched texera and want to change the data locations, existing data volumes need to be recreated and override in the next boot-up, i.e. select y when running docker compose up again:
$ docker compose up
? Volume "texera-single-node-release-1-1-0_workflow_result_data" exists but doesn't match configuration in compose file. Recreate (data will be lost)? (y/N)
y // answer y to this prompt
Add more LLMs or providers
Only Claude Haiku 4.5 is enabled by default. To add more LLMs, open litellm-config.yaml in the installation folder and append entries under model_list. Each entry follows this shape:
  model_list:
    ...
+   - model_name: <name shown in Texera>
+     litellm_params:
+       model: <provider model id>
+       api_key: "os.environ/<API_KEY_ENV_VAR>"
For example, to add OpenAI’s GPT-5.2 and Google’s Gemini 2.5 Pro:
  model_list:
    ...
+   - model_name: gpt-5.2
+     litellm_params:
+       model: gpt-5.2
+       api_key: "os.environ/OPENAI_API_KEY"
+
+   - model_name: gemini-2.5-pro
+     litellm_params:
+       model: gemini/gemini-2.5-pro
+       api_key: "os.environ/GEMINI_API_KEY"
Make sure to set the corresponding API key environment variable when you launch Texera (see Enable the Texera Agent). Get keys from each provider’s console — for example, OpenAI or Google.
If your provider is not Anthropic, OpenAI, or Google, also pass its key into the LiteLLM container by editing docker-compose.yml:
  litellm:
    ...
    environment:
      ANTHROPIC_API_KEY: ${ANTHROPIC_API_KEY:-}
      OPENAI_API_KEY: ${OPENAI_API_KEY:-}
      GEMINI_API_KEY: ${GEMINI_API_KEY:-}
+     <NEW_API_KEY>: ${<NEW_API_KEY>:-}
For the full list of supported providers and model IDs, see the LiteLLM proxy config docs.
Troubleshooting
Port conflicts
If Texera fails to start, a common cause is that ports 8080 or 9000 are already in use by another application. Check which ports are occupied:
lsof -i :8080
lsof -i :9000
Stop the conflicting process, or change Texera’s ports following the instructions in Advanced Settings > Run Texera on other ports.
Volume conflicts
PostgreSQL only runs the database initialization scripts on first startup (when its data volume is empty). If you previously started Texera and then ran docker compose down (without -v), the data volume still exists. On the next docker compose up, the initialization is skipped, which can cause services like lakeFS to fail because their required databases were never created.
To resolve this, remove all existing volumes and start fresh:
docker compose --profile examples down -v
docker compose --profile examples up
⚠️ Warning: docker compose --profile examples down -v permanently deletes all Texera data.
3 - How to run Texera on local Kubernetes
This document explains how to run Texera on Kubernetes locally for development purposes.
1. Prerequisites
Before you begin, you will need a local Kubernetes cluster manager. We use Minikube in this instruction.
- Install Minikube.
- Start your cluster:
- Verify that your node is running. You should see
minikube in your node list when you run: - Install Helm.
- Install local path plugin:
kubectl apply -f https://raw.githubusercontent.com/rancher/local-path-provisioner/master/deploy/local-path-storage.yaml
2. Install Texera using Helm
All the necessary Kubernetes files are located in the bin/k8s directory of this repository.
- Navigate to the
bin directory: - Install the Texera Helm chart. This command will install all Texera services into a new
texera-dev namespace.helm install texera k8s --namespace texera-dev --create-namespace
Note: If you get an error about missing Helm dependencies, navigate to the k8s directory and run the dependency update command, then try the installation again:
cd k8s
helm dependency update
cd ..
helm install texera k8s --namespace texera-dev --create-namespace
3. Verify the Installation
Wait for the required deployments to be in the Running state. You can check their status by running:
kubectl get deployments -n texera-dev
The key deployments required to run Texera are:
texera-webservertexera-file-servicetexera-workflow-computing-unit-manager
4. Accessing the Texera UI
Once the deployments are running, you can access the Texera web interface.
Port-Forwarding (If Required)
By default, the UI should be available at http://localhost:30080.
If you get a “connection refused” error, you may need to manually forward the ingress port. Open a new terminal and run:
kubectl port-forward -n envoy-gateway-system service/$(kubectl get svc -n envoy-gateway-system -l gateway.envoyproxy.io/owning-gateway-name=texera-gateway -o jsonpath='{.items[0].metadata.name}') 30080:80
Login
Open http://localhost:30080 in your browser and log in using the default username and password.
5. Troubleshooting
File Upload Error
If you see an error when trying to upload a file to a dataset, you may need to forward the port for MinIO (our file storage service).
Run the following command in a new terminal:
kubectl port-forward -n texera-dev service/texera-minio 31000:9000
This maps the service’s port 9000 to your local port 31000.
Using Custom-Built Images
To test custom changes, you can update the bin/k8s/values.yaml file to use your own Docker images. After modifying the values.yaml file, upgrade the Helm release to apply the changes:
helm upgrade texera k8s --namespace texera-dev
6. Security Recommendation
For any deployment, especially in production, it’s crucial to apply the principle of least privilege to limit potential damage from a security vulnerability. While the OS user deploying the chart needs kubectl and helm permissions, a more critical concern is the user running the application inside the containers.
Run Containers as a Non-Root User
By default, many container images run as the root user. If an attacker exploits a vulnerability in an application (like the running code on computing unit), they would gain root privileges within the container, giving them full control to access or modify its contents and potentially attack other services.
To prevent this, you should configure the Kubernetes deployments to run the processes as a specific, unprivileged user.
The following is a sample template you can use:
spec:
  template:
    spec:
      securityContext:
        # Run as a non-root user (e.g., user 1001)
        runAsUser: 1001
        runAsGroup: 1001
        # Enforce that the container cannot run as root
        runAsNonRoot: true
        # Make the root filesystem read-only
        readOnlyRootFilesystem: true
      containers:
      - name: texera-webserver
        image: ...
4 - Access/Login to Texera
Instructions on how to install and set up Texera as a developer.
Guide to use Texera on your local machine or development environment.
Prerequisites
We assume you either went through
Texera should be up-and-running on your laptop before proceeding.
Note
Ensure Docker and Docker Compose are installed before building Texera.Access Texera through Browser
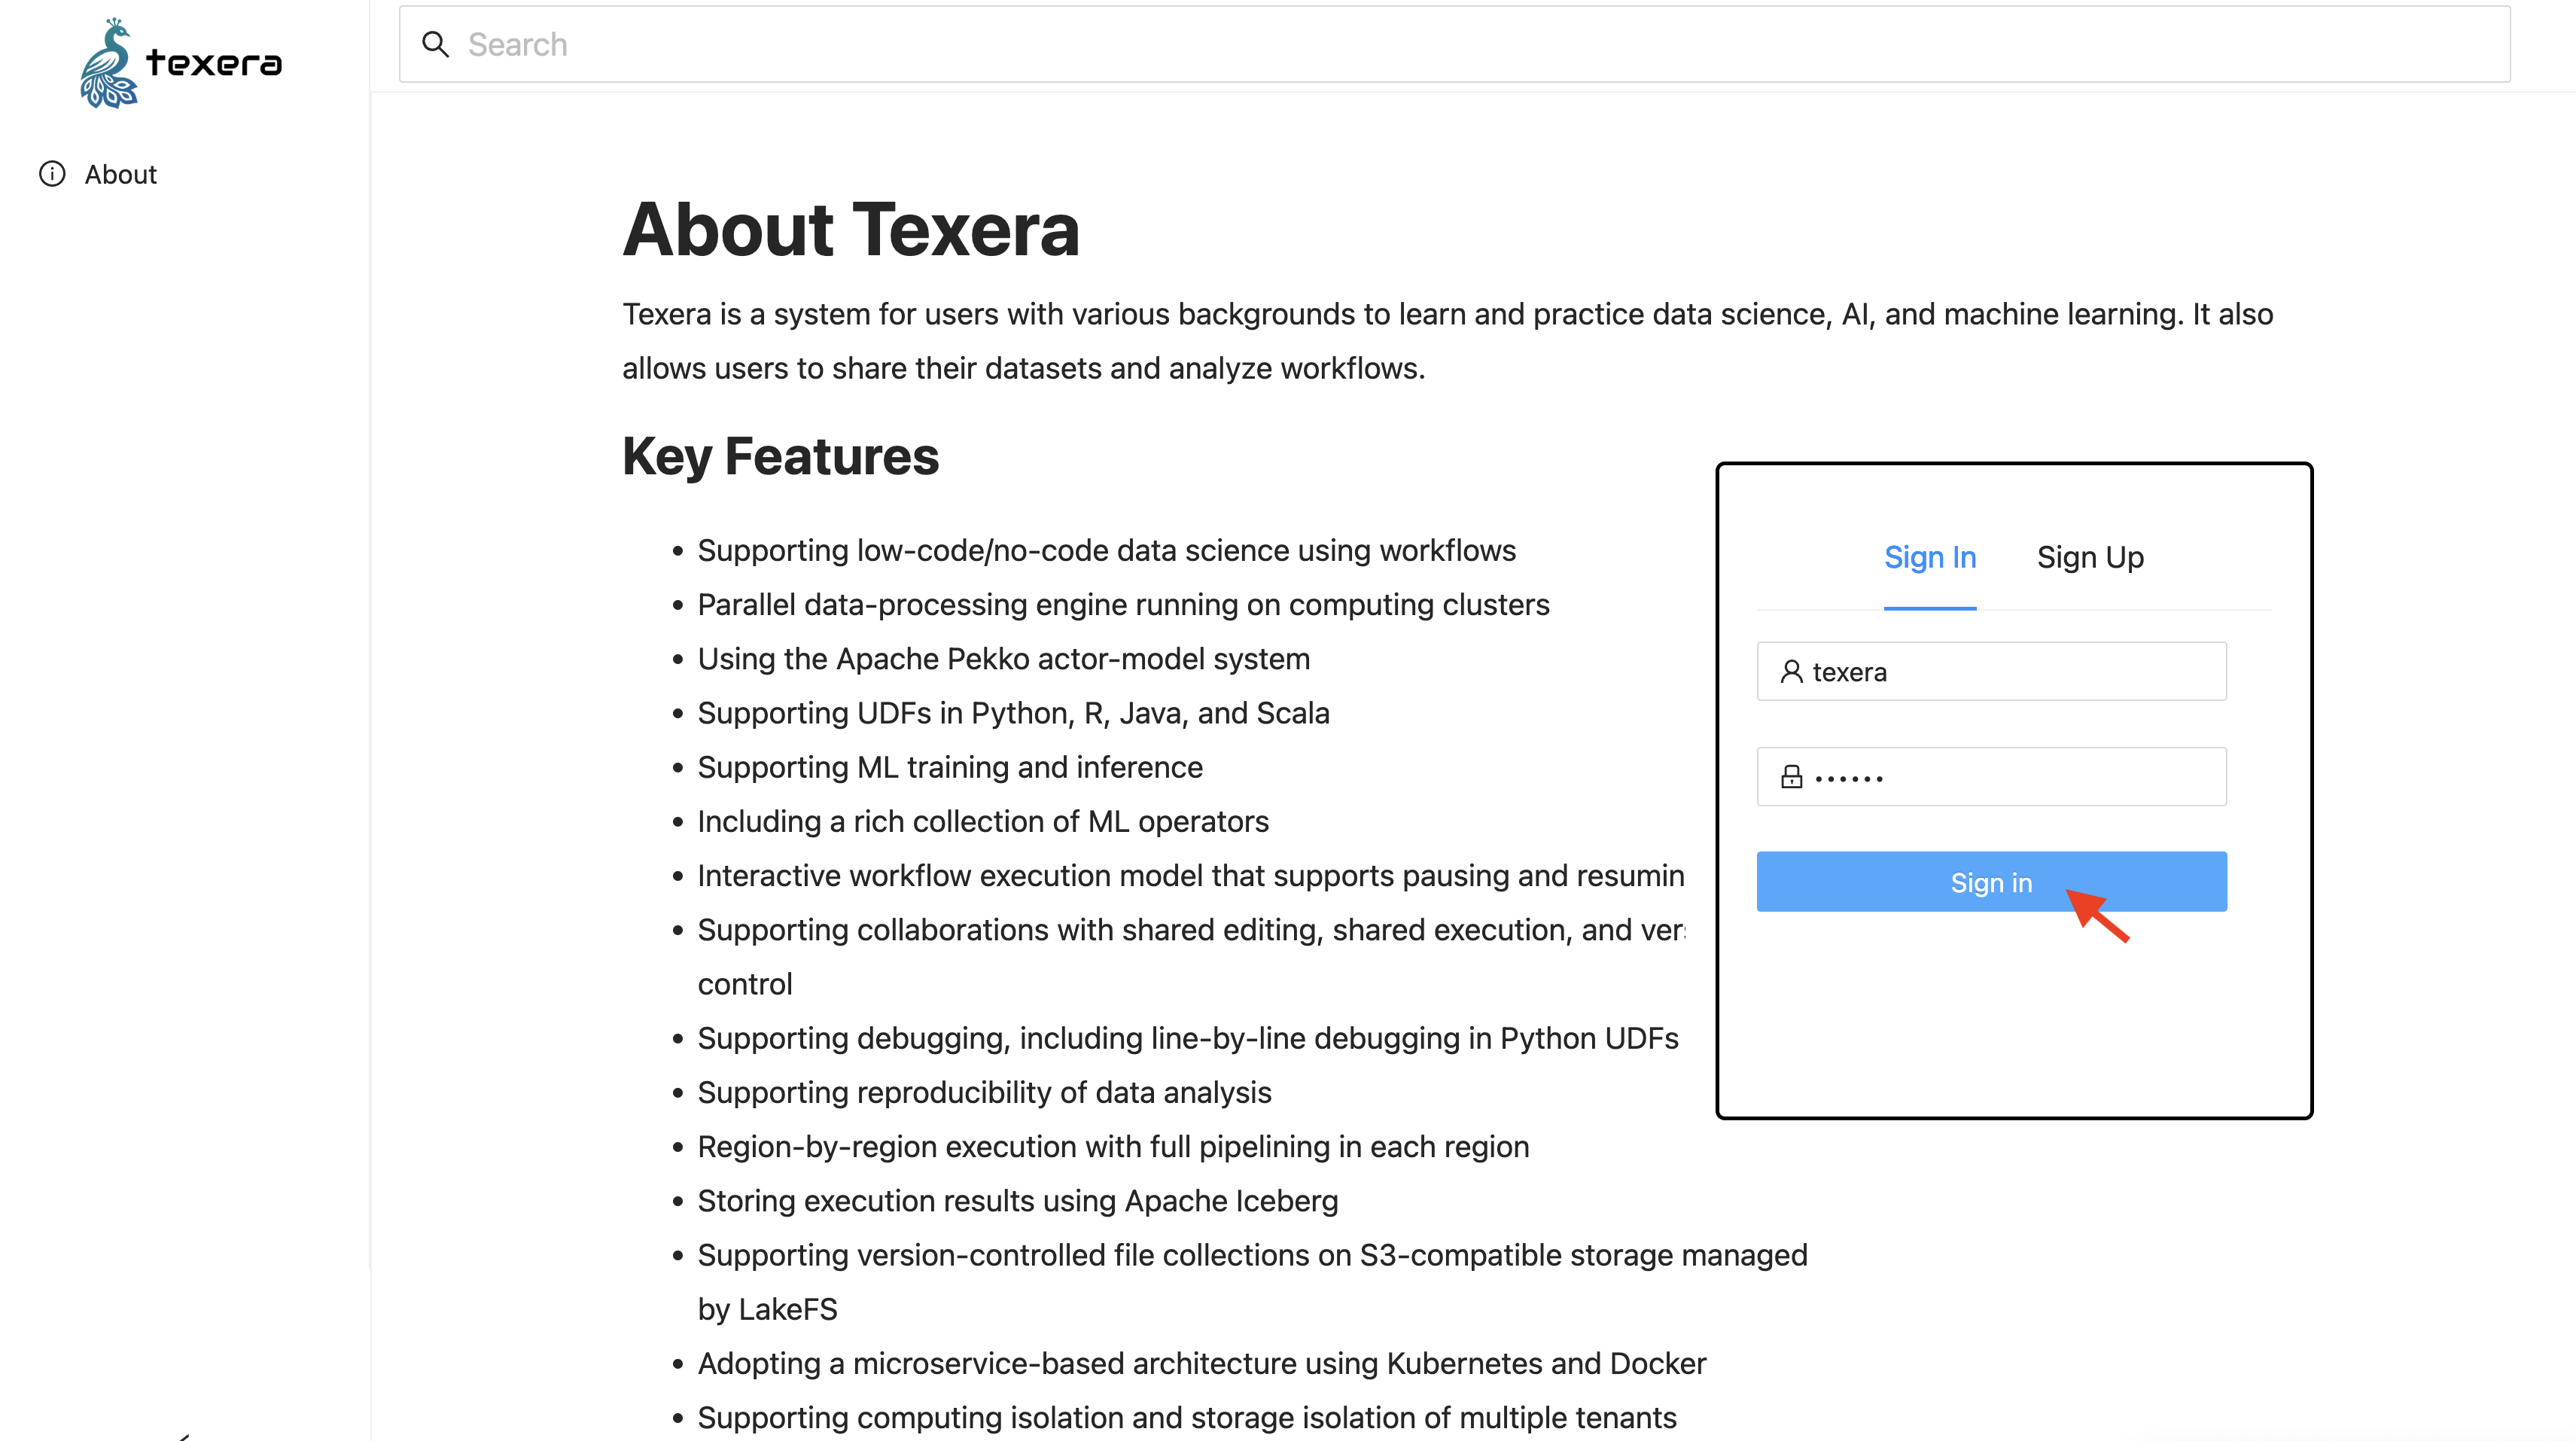
Enter Texera’s URL in your browser to access the interface.
By default, an admin account is pre-created:
| Username | Password |
|---|
texera | texera |
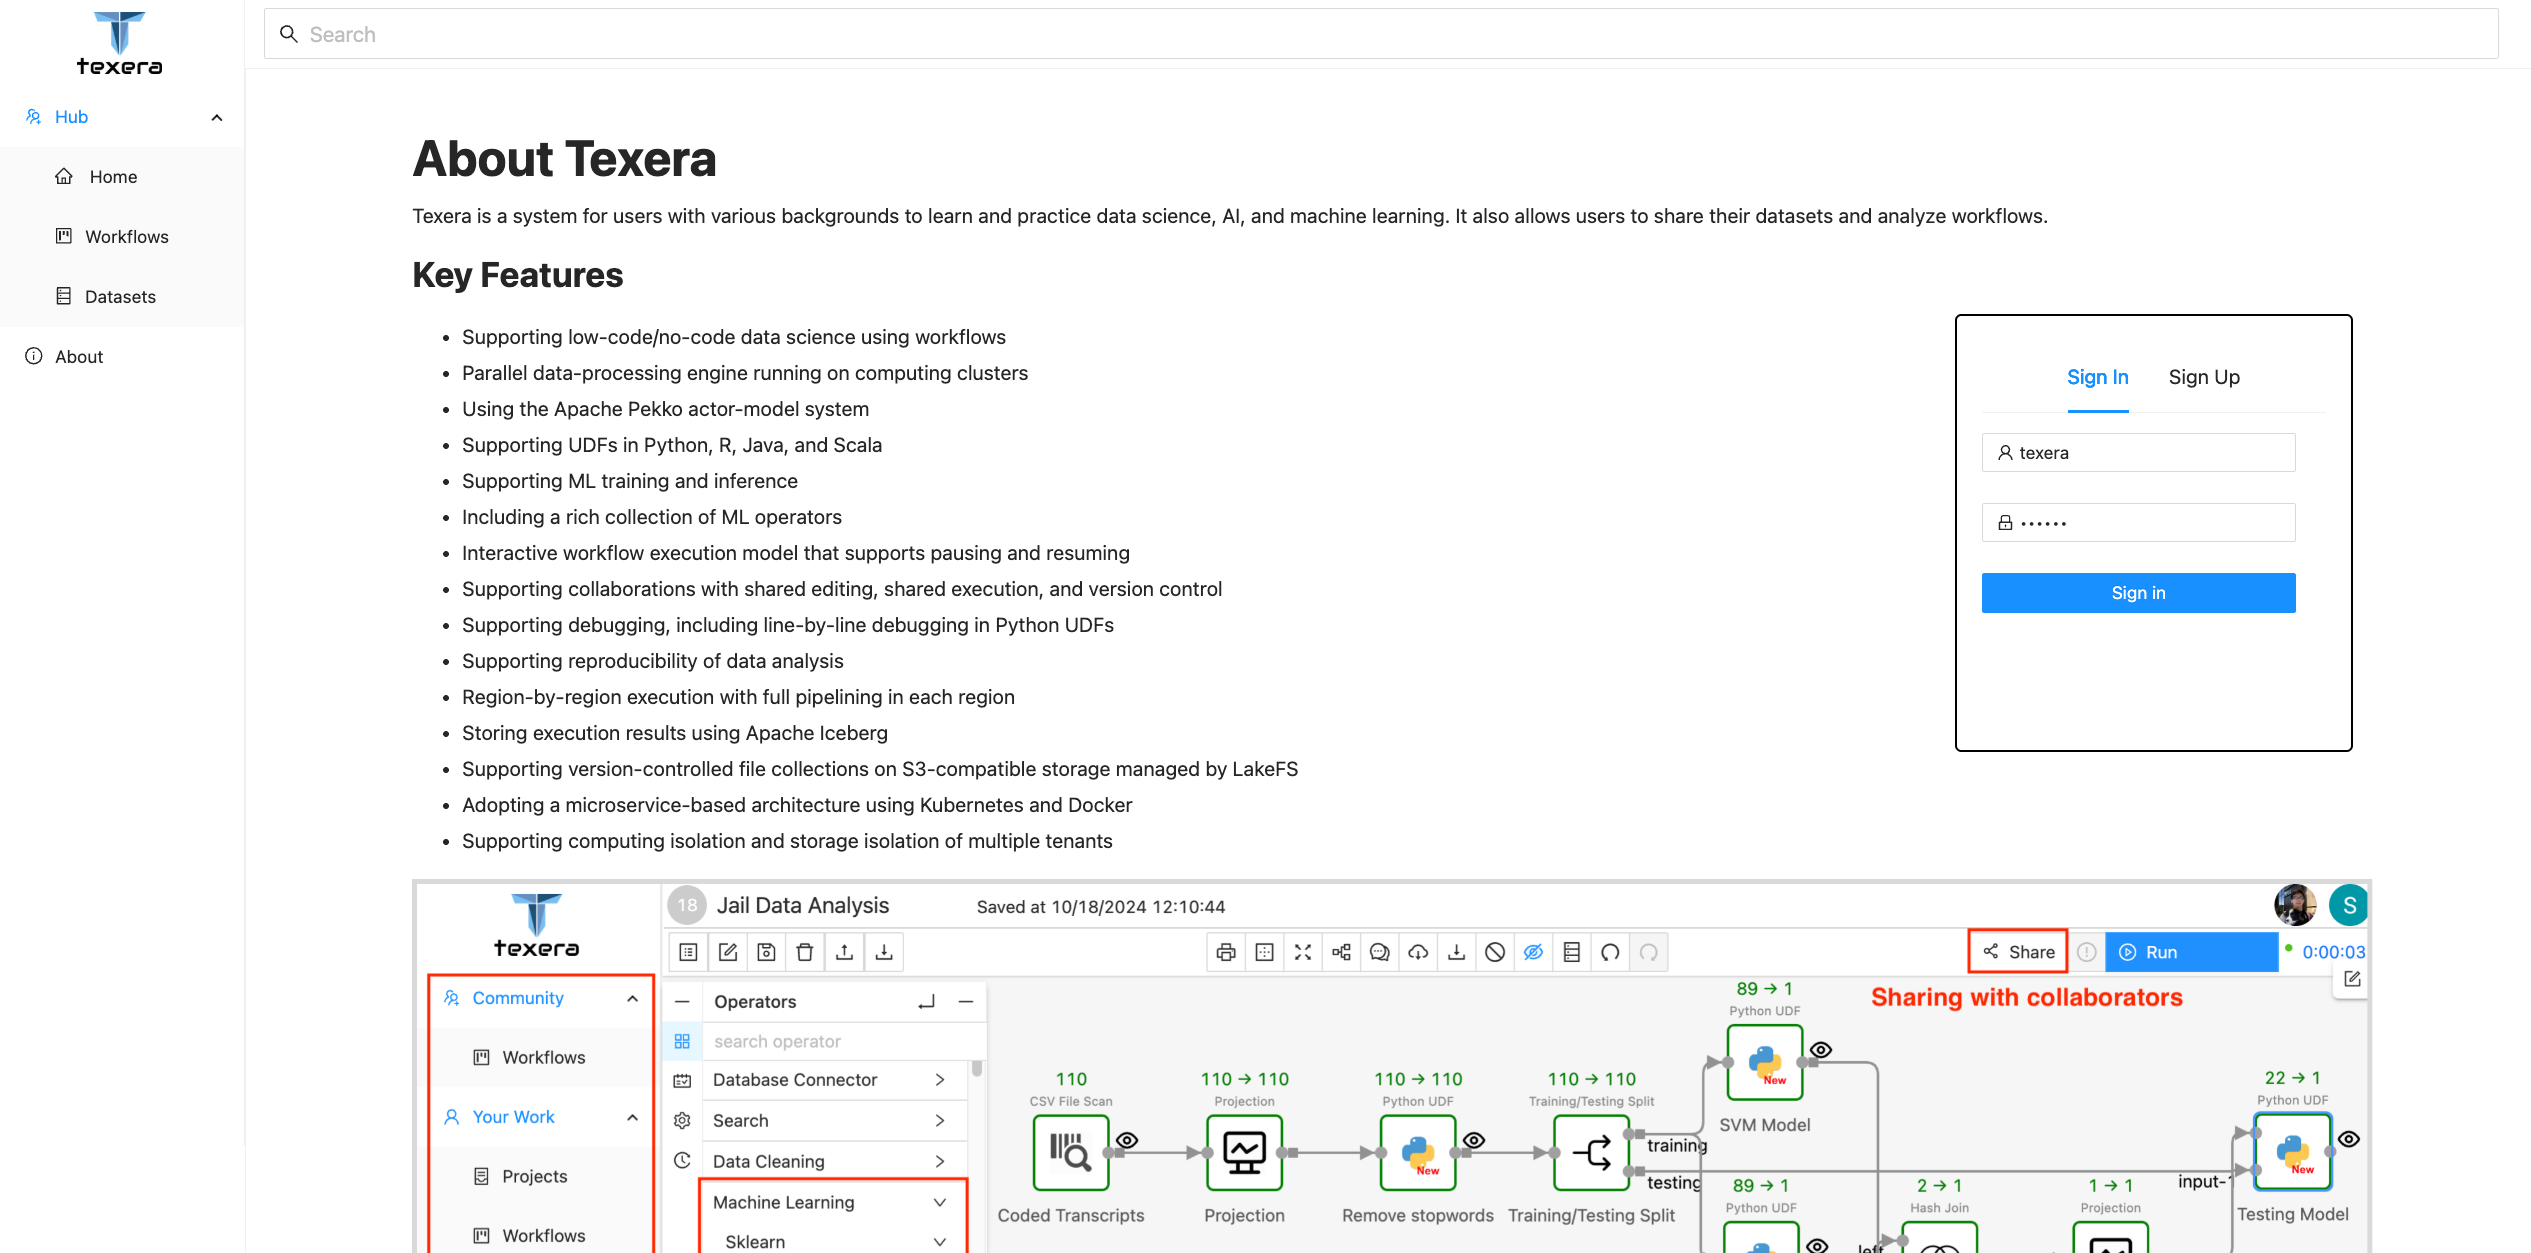
Input credentials and click the Sign in button to log in as the admin.
5 - Texera UI Overview
Explore Texera’s User Dashboard interface and its components.
Understand the layout and functionality of Texera’s User Dashboard.
User Dashboard
Once logged in, you should see the following page:
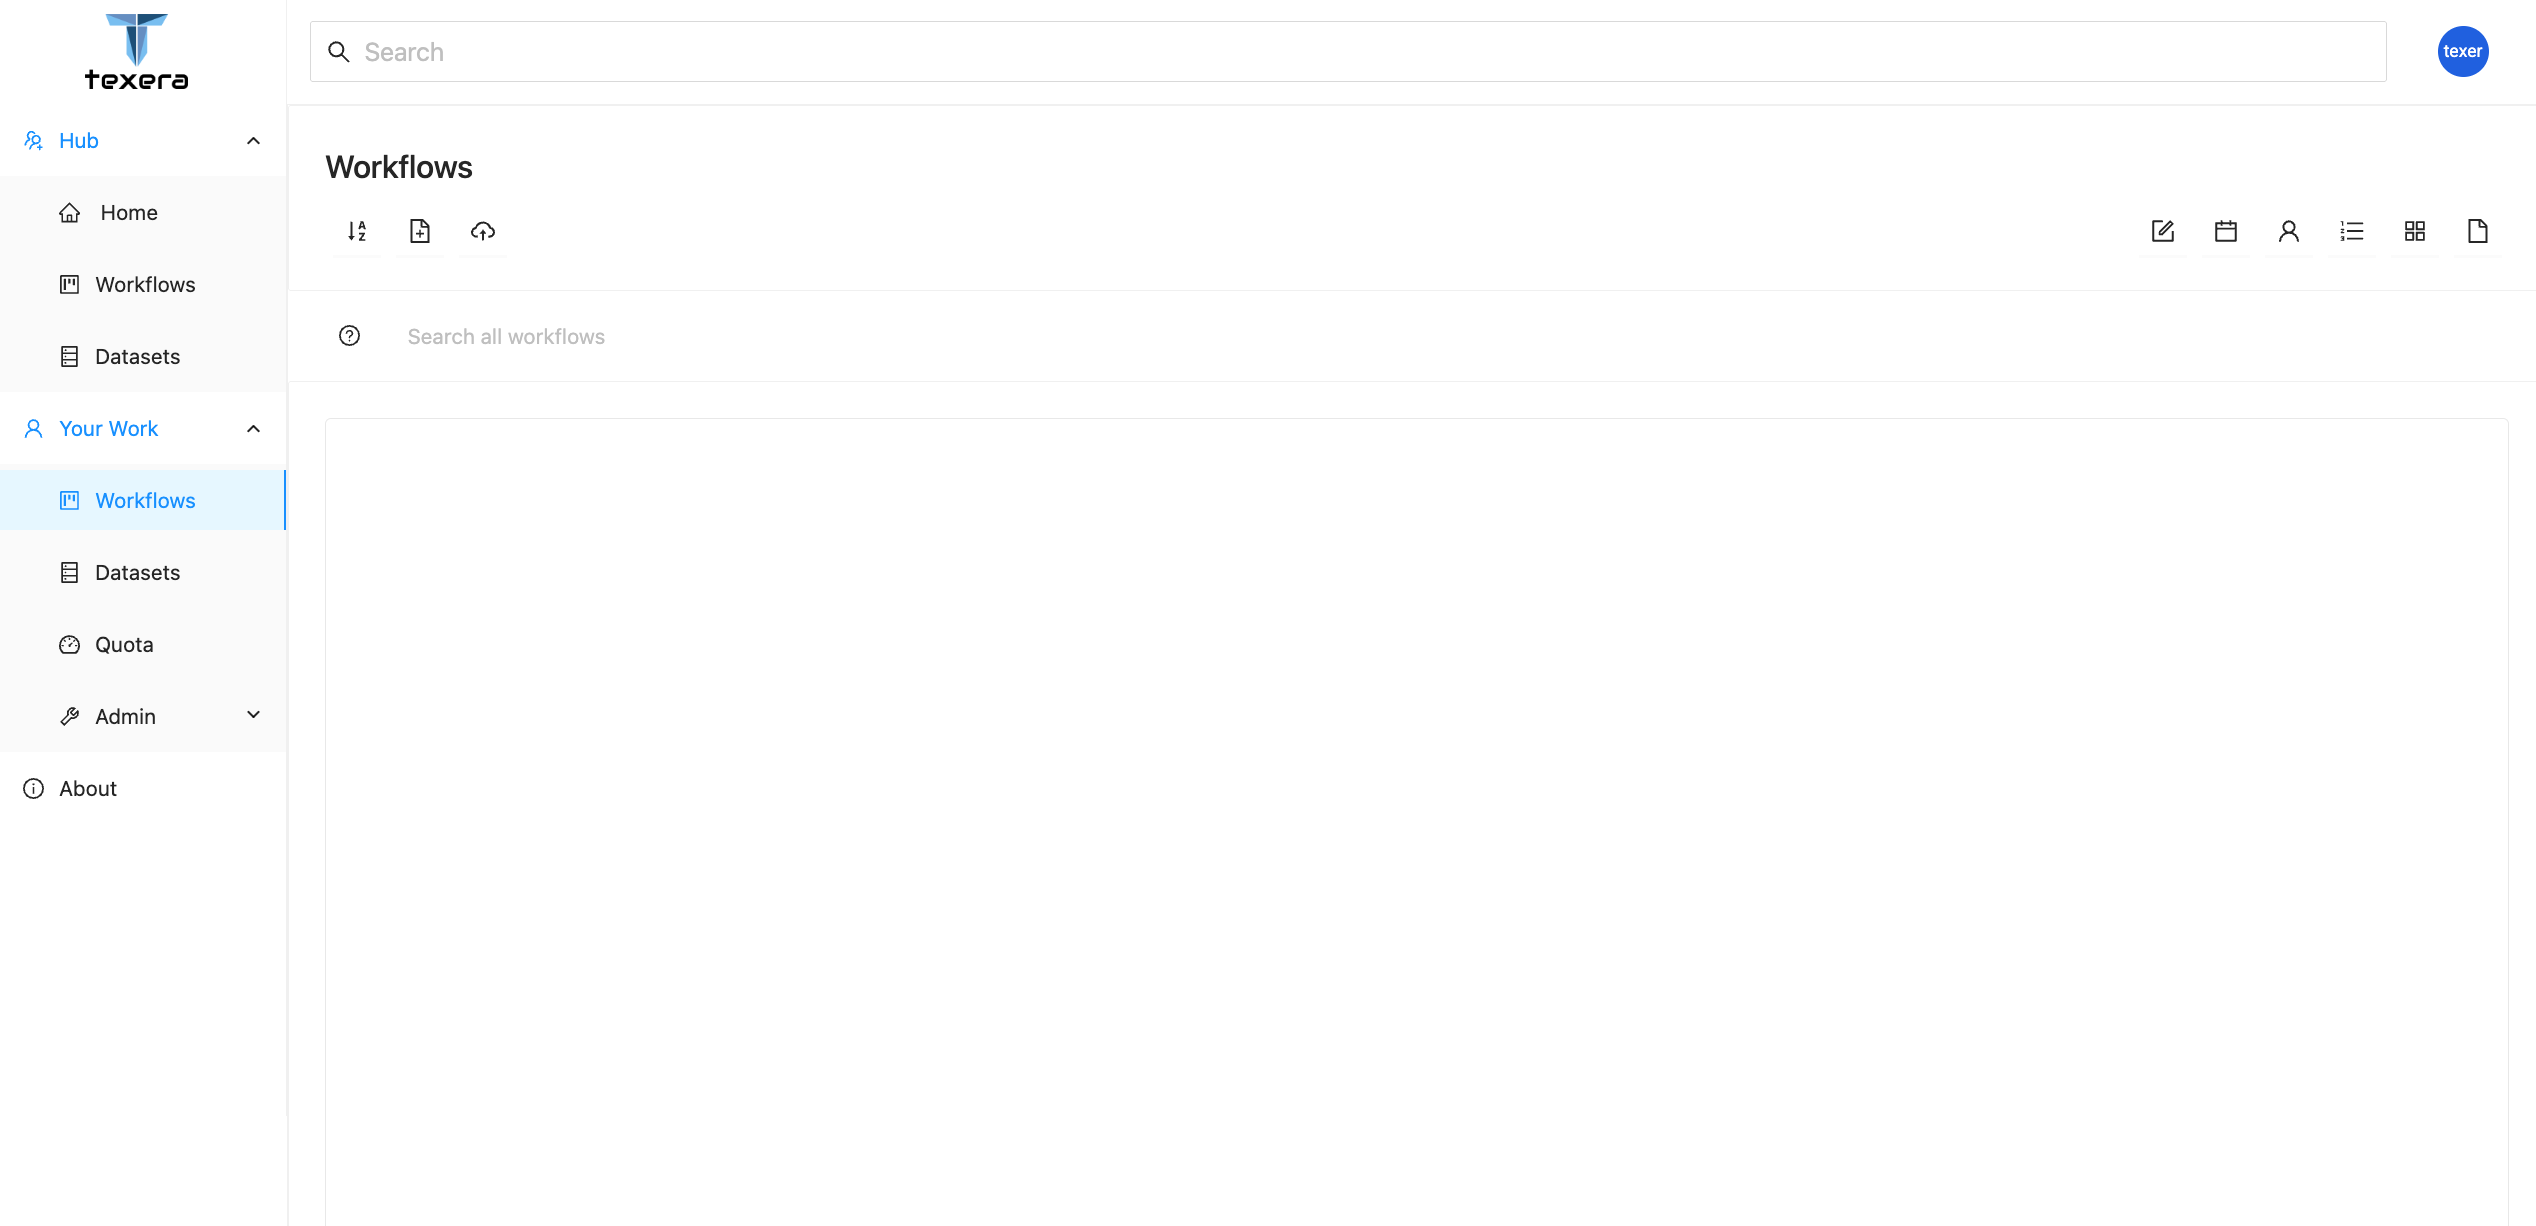
Navigation Bar
On the left sidebar, you can switch between different resource modules:
- Workflows — manage workflow projects.
- Datasets — upload and manage data files.
- Quota — check usage statistics and resource consumption.
- Admin — manage system users (visible only to admins).
Tip
Hover over the navigation icons to see quick tooltips for each section.